Document Scanner in Matlab
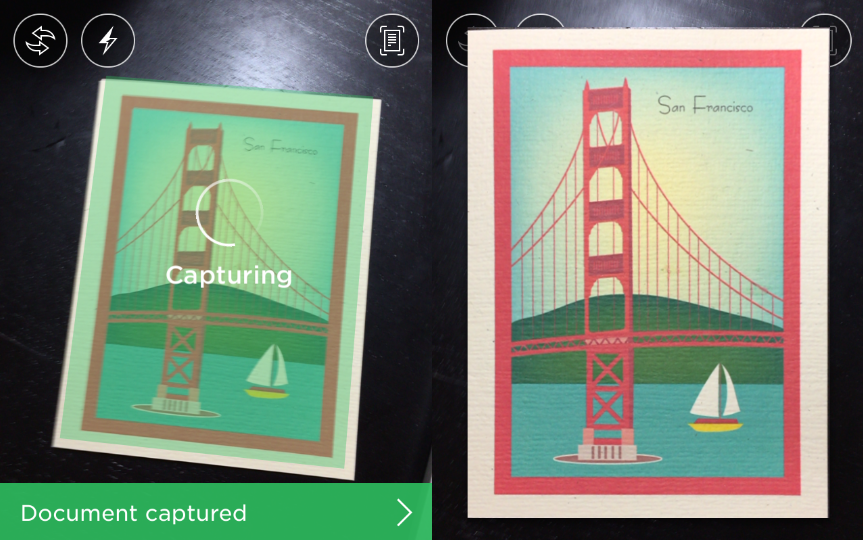
I’ve been using a lot of the document scanning function in Evernote lately. If you have never used it before (or apps with similar functions), what it does is capture the document in the picture and modify it so the document looks like it’s captured by a scanner.
Since conceptually it seems easy enough to implement, I decide to give it a try and build my own document scanner.
Here’s the whole implementation in Matlab.
0. The Problem
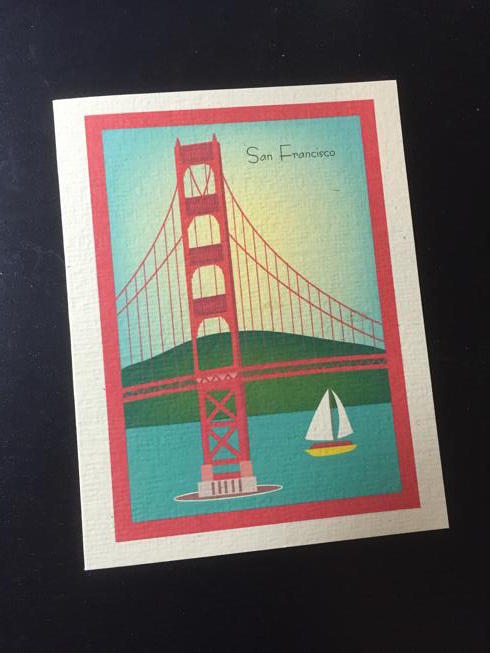
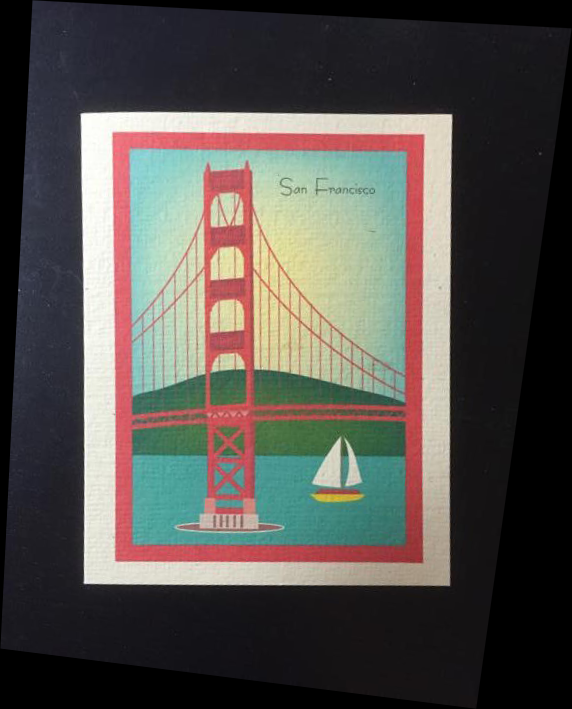
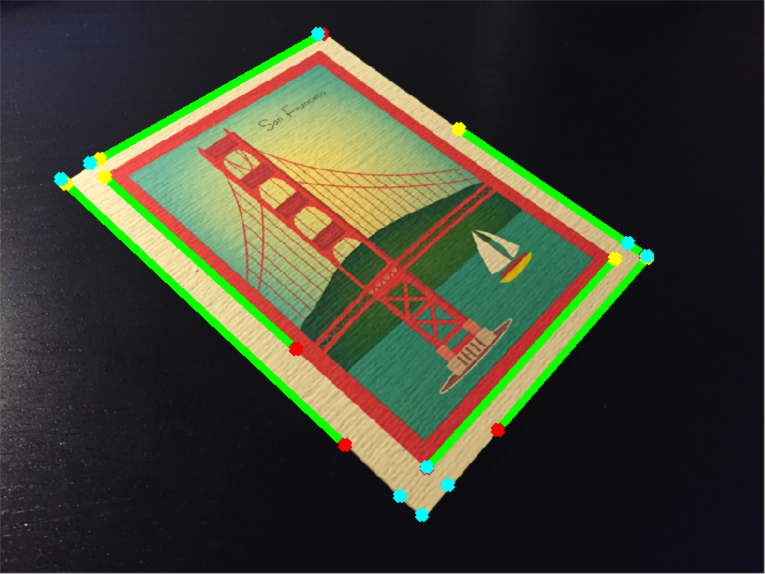
Let’s start with this picture of a postcard. The goal is to cut out the card and modify it as if it’s viewed from the top down.
There are 2 parts to this problem:
- How do we find the boundary of the document from an image?
- Once we know where it is, how do we normalize the perspective viewing the document?
1. Segmenting Out the Document
The first part of the problem can be thought of as a segmentation task: the image consists of the document (foreground) and the surface it’s placed on (background), and we have to extract the foreground out of the image.
Segmentation is a tricky task in the realm of computer vision. Simple, naive methods often aren’t robust enough, while more sophisticated approaches are usually slow and require a lot of parameter tuning. That being said, there are 2 assumptions we can make in this particular application:
- The card is the main object of the image; we don’t have to worry about another rectangular-shaped object being present that’s gonna confuse the algorithm.
- The contrast between the card and background is sufficiently high.
By exploiting these 2 characteristics, we should be able to produce decent segmentation results with the following approach that’s relatively simple.
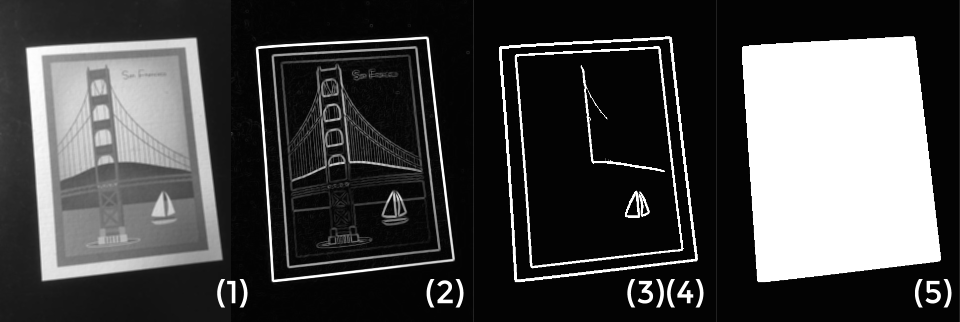
- Convert the image to grayscale & blur it a bit for denoising.
- Compute the gradient magnitude of the grayscale image. This will essentially reveal all the edges on the image.
- Apply a threhshold to the gradient magnitude and produce a gradient mask. This will prune out some weak edges, as well as give us a better idea of how these edges are connected.
- Find all the connected components and remove the small ones. This is done so we can (hopefully) completely remove any background edges.
- Find the convex hull of the remaining connected components. The region inside the hull is naturally the foreground.
The result is a nice, clean mask!
2. Find the Corners
We’re not done with the first part yet. Since the document (from the current perspective) is a quadrilateral object, we want to find the 4 corners around it. An intuitive way is to use some corner detection algorithms to directly locate the corners, but this will not work if the document has rounded corners, such as credit cards.
A more robust way to do this is to detect the 4 lines around the borders, and compute the intersections of these lines that fall within the image.

- Apply edge detection to the foreground mask. We should now have all the line segments around the borders.
- Use Hough transform to identify all the line segments. Matlab provides both
hough()andhoughlines()that can be called back-to-back. - Locate the intersections of these lines. By pruning out the points of intersection that are outside image boundaries, we should ideally be left with the 4 corners of the document.
Now that we have the 4 corners of the document, we’re ready to move on to the second part.
3. Normalize the Perspective
Since images are essentially 2-dimensional matrices, if we multiply every point on it with a 2D transformation matrix, we can shift the image around, rotate it, or skew its scale. This is best illustrated with the following diagram:
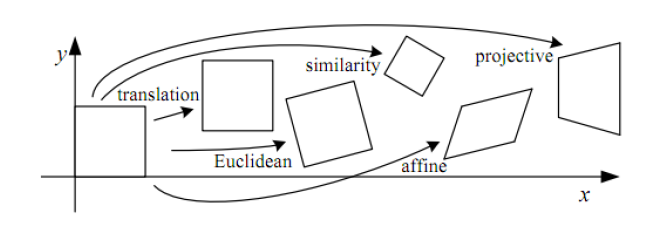
The rightmost one, projective trasform (or homography), is what we’re looking for, as it’s the most general form of 2D linear transformation. Applying an arbitrary homography matrix to a normal image will usually turn it into a funny quadrilateral, like this:
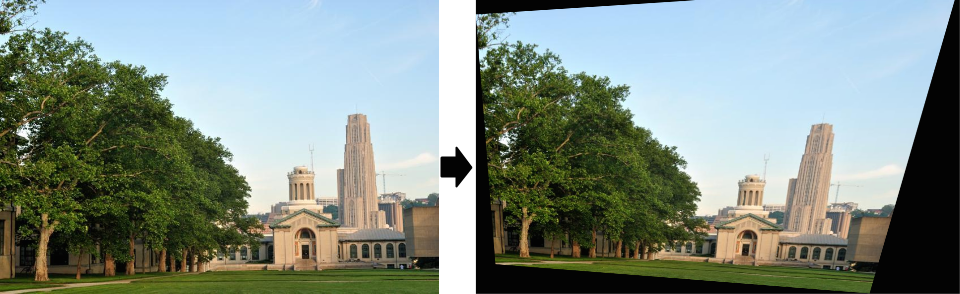
What we want to achieve is the opposite of that: namely, given an arbitrary quadrilateral (represented with 4 points), we want to project it back to its rectangular form (another set of 4 points). This task is called homography estimation. Since how it’s computed is beyond the scope of this article, here’s a detailed handout on the process.
After homography transformation, here’s the final result:
Looking good! We can cut out the postcard to get a cleaner result, but I decide to keep the whole image to demonstrate how it’s skewed after such transformation.
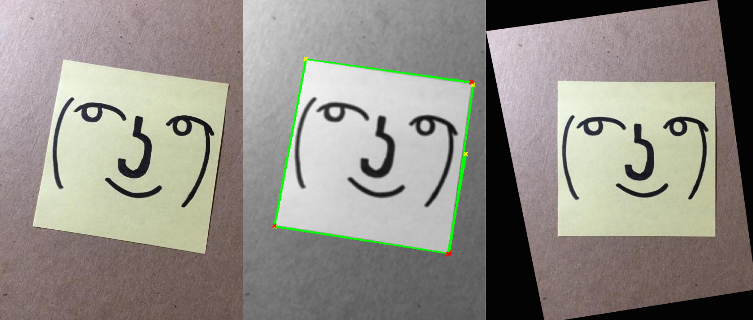
4. More Test Results
Let’s test this pipeline with a few other examples. How about a post-it note?
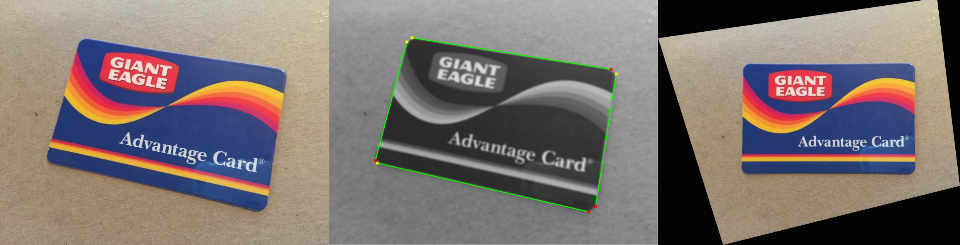
Or a membership card:

Another membership card:
Although these results look great, I imagine you can easily break the algorithm with slightly more complex images.
And…that wraps up the whole pipeline! I’m sure those commercial apps use more sophisticated ways to handle corner cases, but the basic idea is the same.
5. FAQ
Why segmenting out the card first? Can’t you simply apply Hough transform to the grayscale image and locate all the lines?
That’ll work. If we first detect all the lines (as shown below), compute all points of intersections, and fit a convex hull to them, we can still obtain the quadrilateral.
However, there’s one scenario that will potentially break this approach: if there’s a diagonal line lying on the document, that line will likely intersect with one of the borders outside the quadrilateral.
Is there a way to detect the lines other than Hough transform?
I’ve also tried RANSAC + linear square fit, and the results are comparable. I eventually pick Hough transform simply because it’s fewer lines in Matlab.
I ran your Matlab script with my own image; it doesn’t work at all!
There’re mainly 2 factors that will mess up the segmentation: the resolution of Hough transform and the threshold on gradient magnitude. Try tweaking those values, or resize your image to similar resolution as the postcard example.
Besides that, there might be other bugs/design overlook, and you’re more than welcome to test the pipeline yourself and improve its robustness.